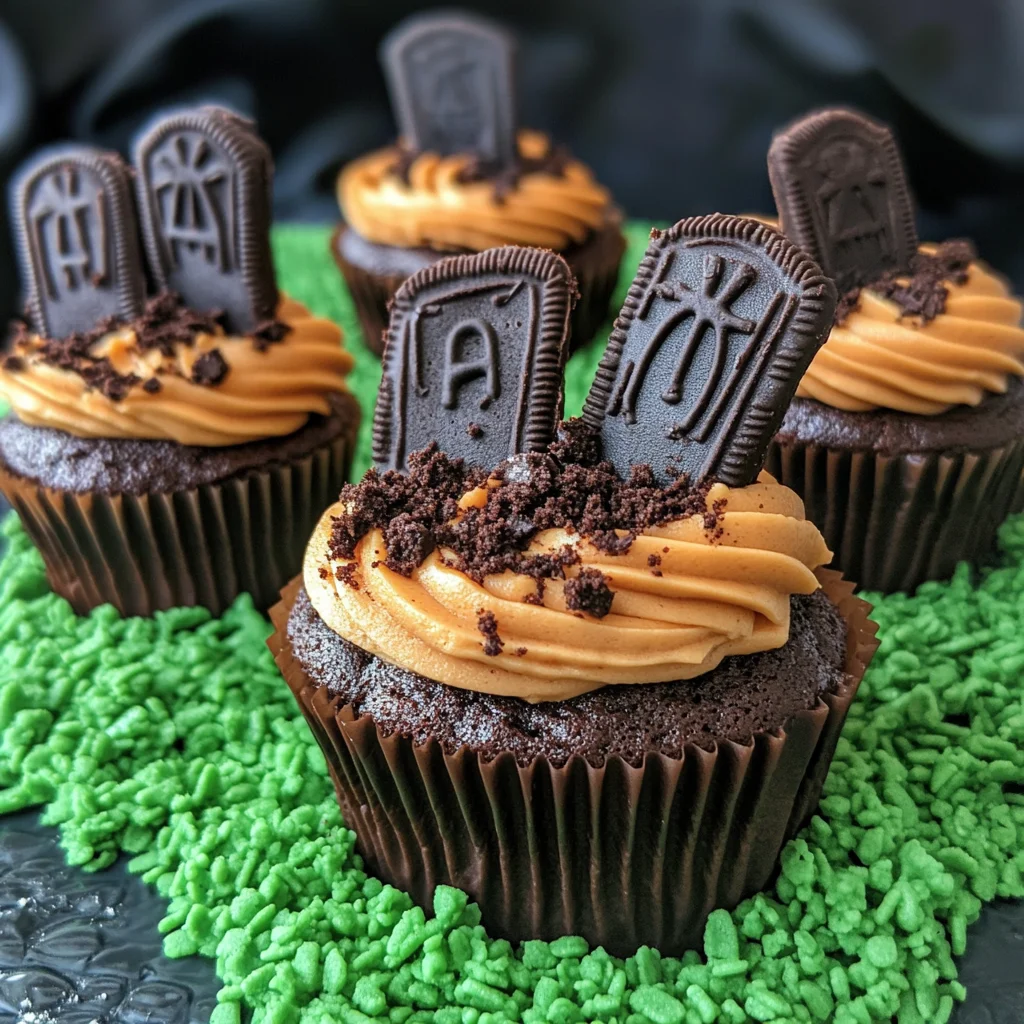
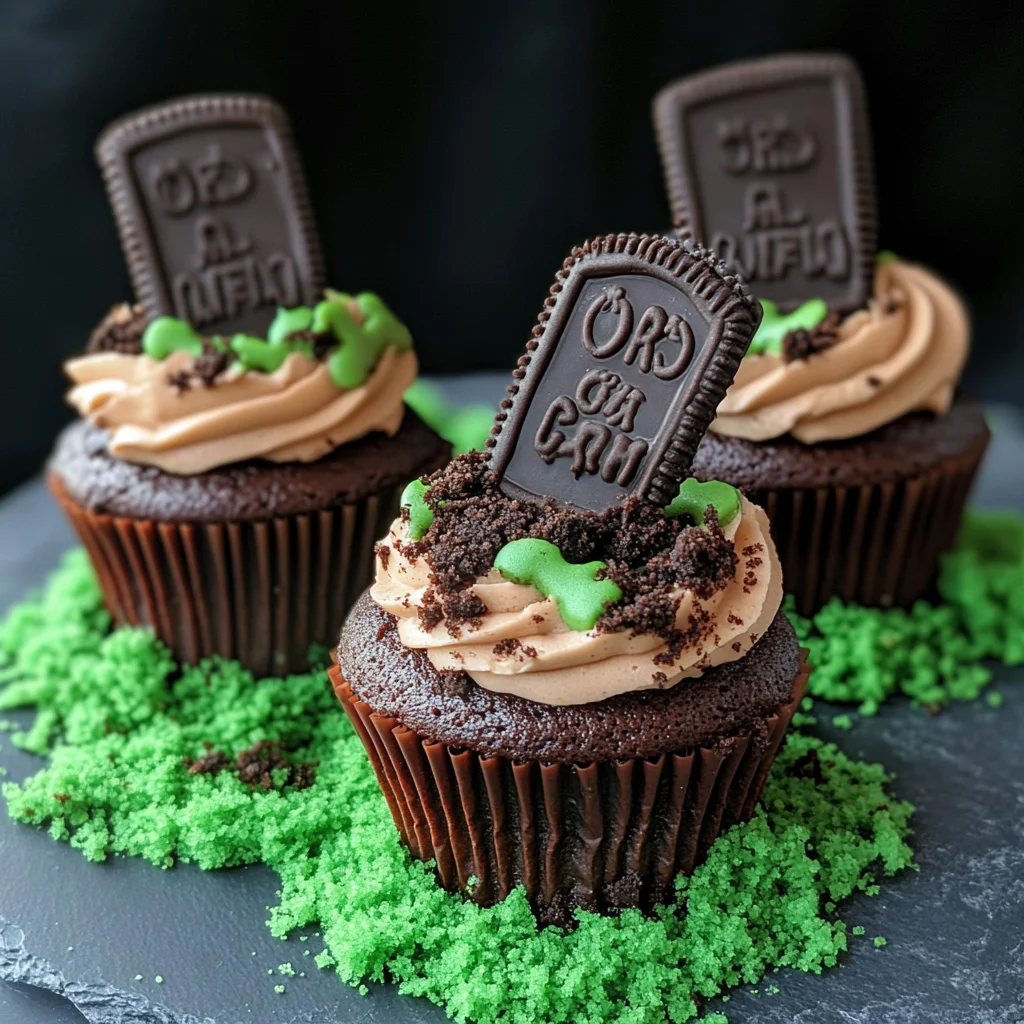
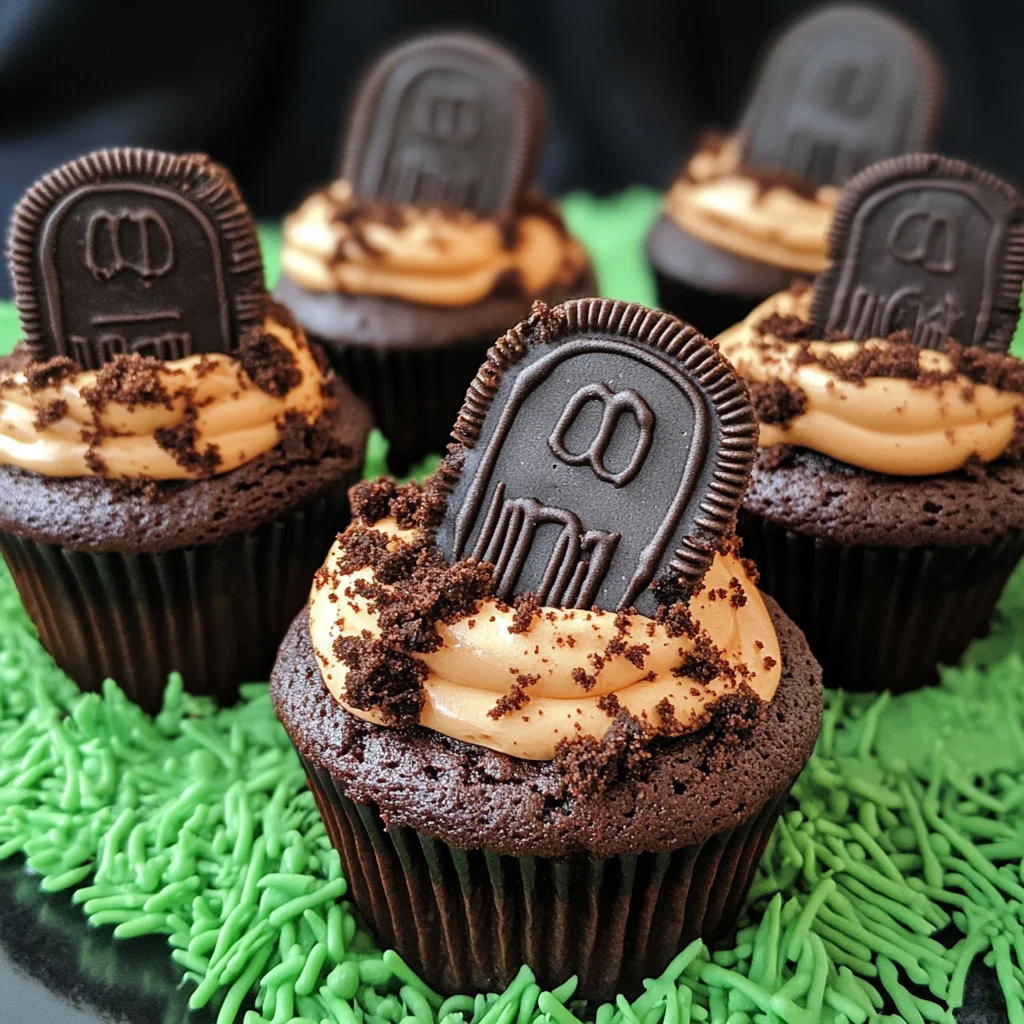
Halloween Graveyard Cupcakes are a fun and spooky treat that will impress your guests at any Halloween gathering. These delightful cupcakes feature a rich chocolate base, filled with creamy Oreo cheesecake, topped with decadent chocolate buttercream, and designed to resemble a graveyard scene. Perfect for parties or as a festive dessert, they are sure to be a hit among kids and adults alike!
Why You’ll Love This Recipe
- Spooky Presentation: These cupcakes are not just delicious but also visually stunning, making them the perfect centerpiece for your Halloween celebration.
- Rich Flavors: The combination of chocolate cupcakes and Oreo cheesecake filling creates an irresistible flavor explosion in every bite.
- Customizable Design: You can get creative with the decoration, adding your personal touch to the graveyard look.
- Easy to Make: With straightforward steps, you can whip up these treats without any hassle.
- Perfect for Sharing: This recipe makes 12 cupcakes, ideal for sharing with friends or family during Halloween festivities.
Tools and Preparation
Before diving into the baking process, ensure you have all the necessary tools ready. This will make your experience smooth and enjoyable.
Essential Tools and Equipment
- Cupcake tin
- Cupcake cases
- Stand mixer or electric whisk
- Piping bags
- Baking paper
- Mixing bowls
- Measuring scales
Importance of Each Tool
- Cupcake Tin: Essential for shaping your cupcakes evenly while baking.
- Stand Mixer: Provides consistent mixing results, especially when preparing buttercream.
- Piping Bags: Crucial for decorating your cupcakes with precision and creativity.
Ingredients
For the Cupcakes
- 12 Lotus biscoff biscuits
- 150 g Dark chocolate (melted)
- 175 g Baking spread or butter (softened, unsalted)
- 175 g Caster sugar
- 3 Eggs (large)
- 2 tbsp Milk
- 150 g Self raising flour
- 25 g Cocoa powder
- 1/4 tsp Baking powder
For the Oreo Cheesecake Filling
- 115 g Full fat cream cheese
- 15 g Icing sugar
- 15 g Oreos (crushed)
- 1/8 tsp Vanilla extract
For the Chocolate Buttercream
- 100 g Butter (softened, unsalted)
- 165 g Icing sugar
- 35 g Cocoa powder
- 1-2 tsp Milk
For the Green Grass Buttercream
- 25 g Butter (softened, unsalted)
- 50 g Icing sugar
- 1/8 tsp Vanilla extract
- Green food colouring
- 35 g Oreos (crushed)
How to Make Halloween Graveyard Cupcakes
Step 1: Create the Biscuit Graves
Start by snapping about a third off each biscuit to make them shorter. Melt the dark chocolate and dip each biscuit into it. Place them on baking paper to set.
Step 2: Decorate the Biscuits
Once the dark chocolate is set, melt the white chocolate. Transfer it to a piping bag and pipe designs onto the biscuits before allowing them to set again.
Step 3: Prepare for Baking
Preheat your oven to 140C Fan/160C/325F/Gas Mark 3 and line your cupcake tin with cupcake cases.
Step 4: Make the Sponge Mixture
In a mixing bowl, combine the baking spread and caster sugar. Use an electric whisk or stand mixer to beat them together for about five minutes until fluffy.
Step 5: Add Wet Ingredients
Add in the eggs and milk. Whisk until well combined.
Step 6: Incorporate Dry Ingredients
Gently fold in self raising flour, cocoa powder, and baking powder until just combined.
Step 7: Fill Cupcake Cases
Divide the batter evenly among the cupcake cases.
Step 8: Bake
Bake in your preheated oven for 25–30 minutes or until a skewer inserted into the center comes out clean. Allow them to cool completely afterward.
Step 9: Make Oreo Cheesecake Filling
While cooling, mix together cream cheese, icing sugar, and vanilla until smooth. Stir in crushed Oreos.
Step 10: Core Cupcakes
Use a cupcake corer or knife to create holes in each cupcake’s center.
Step 11: Fill Cupcakes
Fill each hole with Oreo cheesecake filling using either a spoon or piping bag.
Step 12: Prepare Chocolate Buttercream
Mix softened butter with cocoa powder and icing sugar until smooth. Gradually add milk as needed.
Step 13: Prepare Green Grass Buttercream
Combine softened butter with icing sugar. Add vanilla extract and green food coloring until achieving desired shade.
Step 14: Decorate Cupcakes
Pipe chocolate buttercream onto each cupcake using a round nozzle. Smooth out tops using a palette knife or spoon.
Step 15: Add Biscuit Gravestones
Insert one biscuit gravestone into each cupcake carefully.
Step 16: Create Soil Effect
Sprinkle crushed Oreos around each biscuit grave for an added effect.
Step 17: Finish with Grass Buttercream
Using a piping bag fitted with a grass nozzle or spoon method, add green grass around each grave for that final touch!
Storage Tips
Store your Halloween Graveyard Cupcakes in an airtight container in a cool place; consume leftovers within three days for best freshness!
How to Serve Halloween Graveyard Cupcakes
Halloween Graveyard Cupcakes are not just delicious; they also make for a spooky centerpiece at any Halloween gathering. These cupcakes can be served in various creative ways to enhance their festive appeal.
Individual Treat Boxes
- Use small, clear treat boxes to package each cupcake individually. This makes them easy to share and adds a fun surprise for guests.
Themed Table Setting
- Arrange the cupcakes on a table decorated with Halloween-themed items like cobwebs, pumpkins, and spooky candles. This creates an inviting atmosphere for your celebration.
Accompanied by Spooky Drinks
- Serve these cupcakes alongside themed beverages such as witch’s brew punch or spooky smoothies for added fun.
Cupcake Toppers
- Enhance the presentation with additional cupcake toppers like mini skeletons or edible glitter that complements the graveyard theme.
Dessert Buffet
- Include the cupcakes as part of a dessert buffet featuring other Halloween treats such as cookies, brownies, and candy. This encourages guests to mix and match their favorites.
How to Perfect Halloween Graveyard Cupcakes
Perfecting your Halloween Graveyard Cupcakes ensures they’ll impress everyone at your Halloween party. Here are some helpful tips to elevate your baking game.
- Use Fresh Ingredients: Always opt for fresh eggs and high-quality chocolate for the best flavor and texture.
- Cool Completely: Let the cupcakes cool completely before filling them; this prevents the filling from melting or spilling out.
- Pipe with Precision: Use a piping bag for both buttercreams to achieve neat and attractive designs on your cupcakes.
- Experiment with Colors: Don’t hesitate to mix different shades of green in your grass buttercream to create more depth and visual interest.
- Store Properly: Keep leftovers in an airtight container in a cool place to maintain freshness and flavor.
Best Side Dishes for Halloween Graveyard Cupcakes
Pairing sides with your Halloween Graveyard Cupcakes can enhance your festive spread. Here are some delightful options that complement these spooky treats well.
- Pumpkin Soup: A warm and creamy pumpkin soup adds a seasonal touch to your menu, perfect for cozy fall gatherings.
- Ghostly Cheese Platter: Create a cheese board with ghost-shaped cheeses and crackers for a savory contrast to sweet cupcakes.
- Witch’s Fingers Veggie Platter: Serve an assortment of green veggies shaped like fingers with hummus or dip, making it fun and thematic.
- Mummy Hot Dogs: Wrap sausages in puff pastry strips to resemble mummies, offering guests a savory snack option.
- Bat Wing Chicken Drums: Seasoned chicken wings that resemble bat wings can be a great finger food alongside dessert.
- Frankenstein Veggie Cups: Create individual cups filled with assorted veggies topped with guacamole or ranch dressing resembling Frankenstein’s face.
Common Mistakes to Avoid
When making Halloween Graveyard Cupcakes, it’s easy to overlook some key steps. Here are common mistakes you should avoid:
-
Ignoring the cooling time: Allowing cupcakes to cool completely before filling or frosting is crucial. If not cooled, the frosting may melt and the filling can ooze out.
-
Overmixing the batter: Overmixing can lead to dense cupcakes. Mix until just combined for a light, fluffy texture.
-
Skipping the coring step: Forgetting to core the cupcakes means missing out on the delicious cheesecake filling. This step adds flavor and fun!
-
Not using room temperature ingredients: Cold butter or eggs can affect your batter’s consistency. Ensure all ingredients are at room temperature for best results.
-
Improper storage: Storing cupcakes in an airtight container without letting them cool properly can lead to soggy treats. Always let them cool first.
Storage & Reheating Instructions
Refrigerator Storage
- Store in an airtight container.
- Keep in the refrigerator for up to 3 days.
Freezing Halloween Graveyard Cupcakes
- Freeze unfilled cupcakes for up to 2 months.
- Wrap each cupcake individually in plastic wrap and then place them in a freezer bag.
Reheating Halloween Graveyard Cupcakes
- Oven: Preheat to 350°F (175°C) and warm for about 10 minutes.
- Microwave: Heat for 10-15 seconds on low power, checking frequently.
- Stovetop: Place on a warm plate covered with foil for a few minutes.
Frequently Asked Questions
Here are some common questions regarding Halloween Graveyard Cupcakes:
Can I use other types of cookies for decoration?
Yes! Feel free to use any cookies you like for the gravestones or soil. Creative choices can enhance your spooky theme!
How do I make these cupcakes gluten-free?
To make gluten-free Halloween Graveyard Cupcakes, substitute self-raising flour with a gluten-free blend and ensure all other ingredients are certified gluten-free.
How can I customize the filling?
You can customize the filling by adding different crushed cookies or even fruit purees mixed with cream cheese for a unique flavor twist.
Are these cupcakes suitable for parties?
Absolutely! Halloween Graveyard Cupcakes are visually striking and perfect for parties or gatherings, delighting both kids and adults alike.
What is the best way to pipe frosting?
Using a piping bag fitted with a round nozzle works well. Practice piping on parchment paper first if you’re new to it!
Final Thoughts
These Halloween Graveyard Cupcakes are not only adorable but also incredibly versatile, making them perfect for any spooky celebration. Feel free to customize them with different fillings or decorations based on your preferences. Give this recipe a try, and enjoy crafting these delightful treats that are sure to impress your guests!

Halloween Graveyard Cupcakes
- Total Time: 1 hour
- Yield: Makes 12 cupcakes 1x
Description
Create spooky yet delicious Halloween Graveyard Cupcakes that everyone will love! Try this fun recipe today, perfect for any Halloween party!
Ingredients
- 12 Lotus biscoff biscuits
- 150 g dark chocolate (melted)
- 175 g baking spread (softened, unsalted)
- 175 g caster sugar
- 3 large eggs
- 2 tbsp milk
- 150 g self-raising flour
- 25 g cocoa powder
- 1/4 tsp baking powder
- 115 g cream cheese (full fat)
- 15 g icing sugar
- 15 g Oreos (crushed)
- 1/8 tsp vanilla extract
- 100 g butter (softened, unsalted)
- 165 g icing sugar
- 35 g cocoa powder
- 1–2 tsp milk
- 25 g butter (softened, unsalted)
- 50 g icing sugar
- 1/8 tsp vanilla extract
- green food coloring
- 35 g Oreos (crushed)
Instructions
- Preheat the oven to 140C Fan/160C/325F/Gas Mark 3 and line a cupcake tin with cases.
- For the cupcakes, mix baking spread and caster sugar until fluffy. Add eggs and milk, mixing well.
- Fold in self-raising flour, cocoa powder, and baking powder. Divide batter into cupcake cases.
- Bake for 25–30 minutes until a skewer comes out clean. Cool completely.
- For the filling, blend cream cheese and icing sugar until smooth; stir in crushed Oreos.
- Core cooled cupcakes and fill with Oreo cheesecake mixture.
- Prepare chocolate buttercream by mixing softened butter with cocoa powder and icing sugar; pipe onto cupcakes.
- Decorate with biscuit gravestones and crushed Oreos for soil effect.
- Prep Time: 30 minutes
- Cook Time: 30 minutes
- Category: Dessert
- Method: Baking
- Cuisine: American
Nutrition
- Serving Size: 1 serving
- Calories: 290
- Sugar: 20g
- Sodium: 150mg
- Fat: 16g
- Saturated Fat: 8g
- Unsaturated Fat: 6g
- Trans Fat: 0g
- Carbohydrates: 33g
- Fiber: 1g
- Protein: 4g
- Cholesterol: 50mg
Keywords: Feel free to use different cookies for decoration based on your theme. To enhance the grass effect, experiment with various shades of green food coloring.