
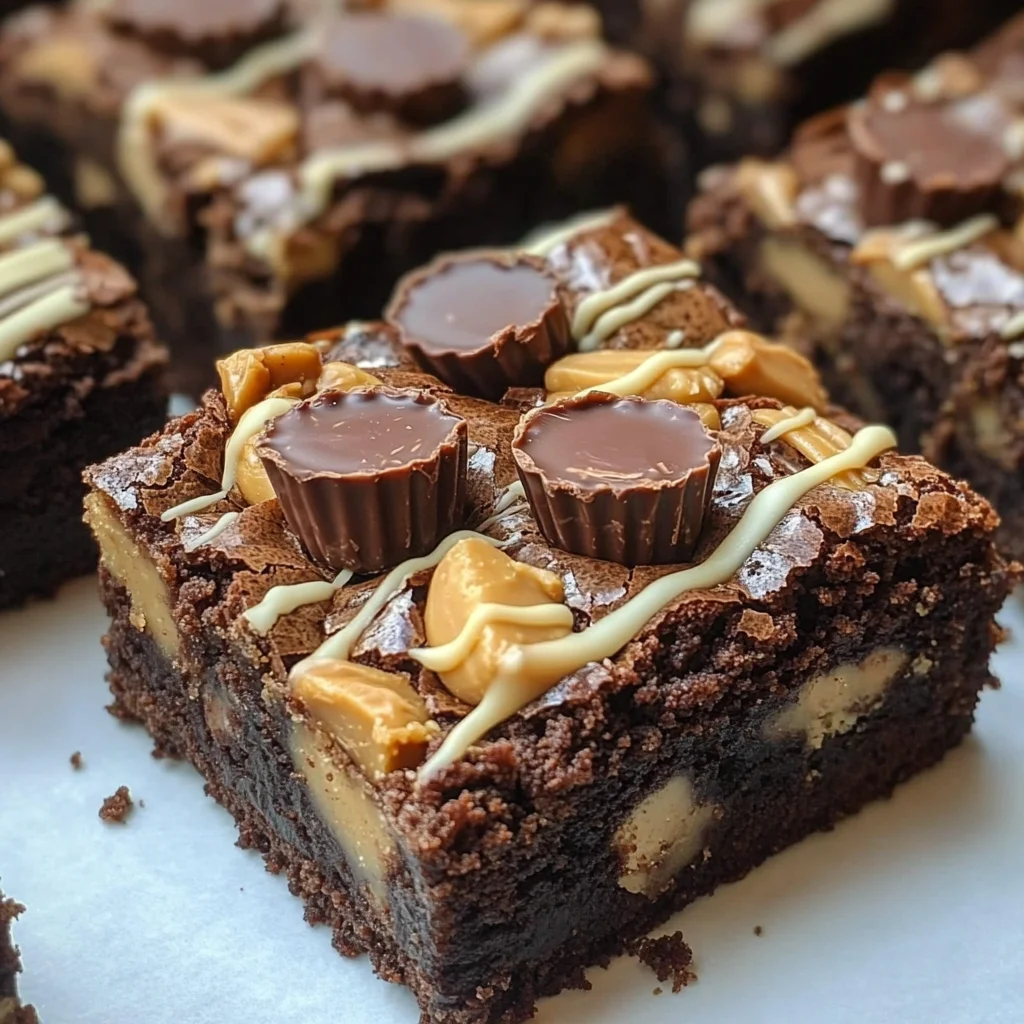
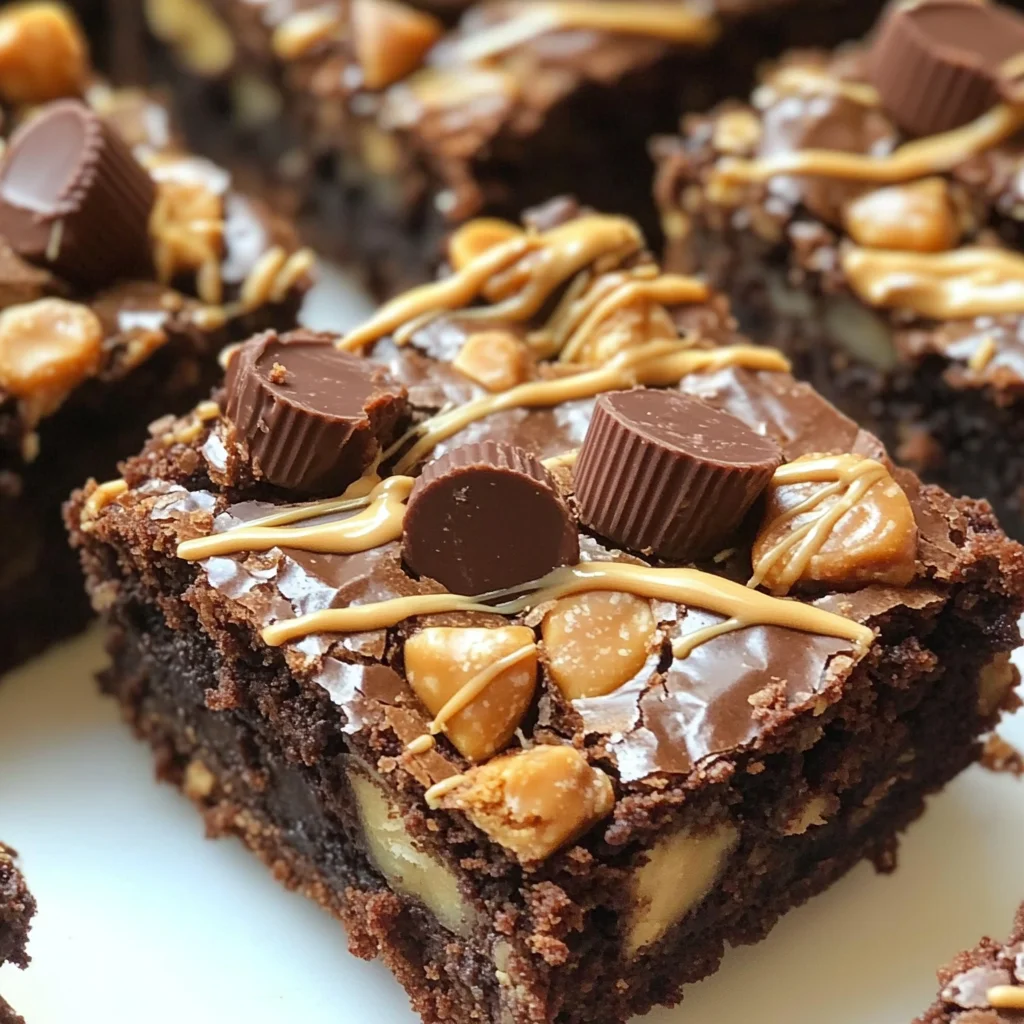
All American Dream Brownies! Peanut Butter Cup Brownies are a delightful fusion of rich chocolate and creamy peanut butter. Perfect for parties, family gatherings, or just a sweet treat at home, these brownies are sure to impress everyone. The combination of fudgy chocolate brownie base and generous layers of peanut butter cups creates a decadent dessert that’s hard to resist.
Why You’ll Love This Recipe
- Irresistible Flavor: The blend of chocolate and peanut butter is a classic that never disappoints.
- Easy to Make: With straightforward steps, even novice bakers can create these delicious brownies.
- Perfect for Sharing: This recipe serves 15, making it ideal for gatherings or potlucks.
- Versatile Treat: Dress them up with toppings or enjoy them plain; they’re delicious either way.
- Rich Texture: The fudgy consistency offers a satisfying bite that pairs perfectly with the peanut butter cups.
Tools and Preparation
To make your baking experience smooth and enjoyable, gather your essential tools before you start. Having the right equipment on hand can help you create the best Peanut Butter Cup Brownies efficiently.
Essential Tools and Equipment
- Mixing bowls
- Whisk
- Silicone spatula
- Baking pan (9×13)
- Heavy-duty foil or parchment paper
Importance of Each Tool
- Mixing bowls: Essential for combining ingredients without spills.
- Whisk: Helps achieve a smooth batter by thoroughly mixing eggs and sugars.
- Silicone spatula: Great for folding ingredients together gently without overmixing.
- Baking pan: A sturdy pan ensures even baking for perfect brownies.
Ingredients
All American Dream Brownies! Peanut butter cups and thick, fudgy chocolate brownies are definitely worthy!
- This recipe is for a 9×13 pan. Divide recipe in half for 8×8 or 9×9 pan of brownies.
- 3 sticks butter (unsalted)
- 4 1/2 ounces unsweetened baking chocolate (roughly chopped)
- 1 1/2 cups 60% Cacao bittersweet chocolate chips
- 6 large eggs (room temp)
- 1 1/2 cups granulated sugar
- 1 1/2 cups brown sugar, packed
- 1 teaspoon salt
- 1 tablespoon vanilla extract
- 1 1/2 cups all-purpose flour or gluten-free flour
- 3/4 teaspoon baking powder
- 1 – 12 oz miniature peanut butter cups
- 1/4 cup milk chocolate chips
- 1/2 cup peanut butter
- 1/2 cup white baking chocolate chips
- 1 – 12 oz miniature peanut butter cups, rough chopped
How to Make Peanut Butter Cup Brownies
Step 1: Preheat the Oven
Preheat your oven to 350 degrees Fahrenheit. This ensures that your brownies bake evenly from the start.
Step 2: Prepare Your Baking Pan
Line a 9×13 baking pan with heavy-duty foil. Lightly grease the foil with vegetable shortening or line it with parchment paper to prevent sticking.
Step 3: Melt the Chocolate Mixture
In a small saucepan over low heat:
1. Melt the butter.
2. Add in the unsweetened chocolate along with bittersweet chocolate chips.
3. Stir constantly until melted and smooth. Remove from heat but leave on burner.
Step 4: Mix Eggs and Sugars
In a large mixing bowl:
1. Add eggs and lightly whisk them.
2. In another bowl, combine granulated sugar, brown sugar, and salt; whisk together.
3. Mix in the eggs until just incorporated.
Step 5: Combine Chocolate Mixture with Sugars
Whisk in the melted chocolate mixture into the sugar and egg mix until just combined. Briefly add in vanilla extract.
Step 6: Incorporate Dry Ingredients
In another bowl:
1. Whisk together flour and baking powder.
2. Sift this mixture into the chocolate mixture and stir gently with a silicone spatula until combined.
Step 7: Layer in Peanut Butter Cups
Pour about two-thirds of the brownie batter into your prepared baking pan:
1. Evenly distribute one bag of miniature peanut butter cups across the surface by pushing them down slightly into the batter.
2. Spread remaining brownie batter on top (some peanut butter cups may peek through).
Step 8: Add Toppings Before Baking
Sprinkle milk chocolate chips evenly over the top of the brownie batter before placing it in the oven.
Step 9: Bake Your Brownies
Bake in the preheated oven for about 35 minutes or until a toothpick comes out clean from the center.
Step 10: Cool and Decorate
Once baked:
1. Transfer to a cooling rack for about 15 minutes to cool down.
2. Scatter roughly chopped peanut butter cups on top while still warm.
Step 11: Prepare Peanut Butter Drizzle
While cooling:
1. Melt peanut butter and white chocolate together in a microwave-safe bowl at one-minute intervals, whisking until smooth.
2. Transfer melted mixture to a ziplock bag, snip off one corner, and drizzle over cooled brownies.
Step 12: Serve
Once set, cut into squares and enjoy your Peanut Butter Cup Brownies at room temperature!
How to Serve Peanut Butter Cup Brownies
These Peanut Butter Cup Brownies are a delightful treat that can be enjoyed in many ways. Whether you’re hosting a party or enjoying a cozy night in, here are some serving suggestions to elevate your brownie experience.
With a Scoop of Ice Cream
- Vanilla ice cream pairs perfectly with the rich chocolate and peanut butter flavors, adding a creamy texture.
Topped with Whipped Cream
- Light and fluffy whipped cream adds an airy contrast to the dense brownies, making each bite feel indulgent.
Drizzled with Chocolate Sauce
- A drizzle of warm chocolate sauce enhances the chocolaty goodness and creates an appealing presentation.
Served with Fresh Berries
- Fresh strawberries or raspberries provide a refreshing tartness that balances the sweetness of the brownies.
Accompanied by Coffee or Tea
- Pairing these brownies with a cup of coffee or tea makes for a comforting dessert experience.
How to Perfect Peanut Butter Cup Brownies
To achieve the ultimate Peanut Butter Cup Brownies, consider these helpful tips that ensure delicious results every time.
- Use room temperature eggs: This helps create a smoother batter and ensures even mixing.
- Melt chocolate gently: Avoid overheating; melting at low heat prevents burning and retains the smooth consistency.
- Don’t overmix: Mix just until combined when adding flour; this keeps your brownies fudgy rather than cake-like.
- Check for doneness: Insert a toothpick in the center; it should come out with moist crumbs, not wet batter.
- Cool before cutting: Allowing brownies to cool completely helps them set properly, making them easier to cut into neat squares.
- Store properly: Keep them in an airtight container at room temperature for up to five days for optimal freshness.
Best Side Dishes for Peanut Butter Cup Brownies
When serving these decadent brownies, consider pairing them with complementary side dishes that enhance their flavor. Here are some great options:
- Fresh Fruit Salad: A mix of seasonal fruits adds brightness and fresh flavor that cuts through the richness of the brownies.
- Chocolate Chip Cookies: Classic cookies offer another layer of sweetness and texture alongside your brownies.
- Nutty Granola Parfait: Layer granola with yogurt and berries for a wholesome contrast to the fudgy brownies.
- Cheesecake Bites: Mini cheesecake pieces provide creamy indulgence that pairs well with chocolate.
- Caramel Sauce Dipping: A side of warm caramel sauce allows guests to dip their brownies for extra sweetness.
- Mini Milkshakes: Small milkshakes are fun and flavorful, making them perfect companions for rich desserts like brownies.
Common Mistakes to Avoid
Avoiding common mistakes can make your Peanut Butter Cup Brownies even better. Here are some pitfalls to watch out for:
- Boldly skip the room temperature eggs: Using cold eggs can cause the batter to curdle. Always bring your eggs to room temperature for a smoother mix.
- Boldly ignore the baking time: Baking too long can lead to dry brownies. Keep an eye on them and start checking for doneness a few minutes early.
- Boldly overlook greasing the pan: If you skip greasing, your brownies may stick. Use parchment paper or grease the foil lightly with vegetable shortening.
- Boldly mix too much: Overmixing can make brownies dense. Stir until just combined for that perfect fudgy texture.
- Boldly forget to chop peanut butter cups: Leaving the peanut butter cups whole will prevent them from melting into the brownie. Chop them up to distribute flavor evenly.
Storage & Reheating Instructions
Refrigerator Storage
- Store the brownies in an airtight container.
- They will last up to 1 week in the fridge.
FreezingPeanut Butter Cup Brownies
- Cut brownies into squares before freezing.
- Wrap each piece in plastic wrap and place in a freezer-safe container.
- They can be frozen for up to 3 months.
Reheating Peanut Butter Cup Brownies
- Oven: Preheat oven to 350°F (175°C), place brownies on a baking sheet, and heat for about 10-15 minutes.
- Microwave: Warm individual squares for about 10-15 seconds until just soft.
- Stovetop: Place in a skillet over low heat, cover, and warm for about 5 minutes.
Frequently Asked Questions
Here are some common questions about making Peanut Butter Cup Brownies:
How do I ensure my Peanut Butter Cup Brownies are fudgy?
To achieve a fudgy texture, avoid overmixing your batter and ensure you use enough fat from the butter and chocolate.
Can I use different types of chocolate chips?
Absolutely! You can mix and match dark, milk, or even white chocolate chips according to your preference.
What can I substitute for peanut butter?
If you’re looking for alternatives, try almond butter or sunflower seed butter as delicious substitutes.
How should I store leftover brownies?
Store leftovers in an airtight container at room temperature or refrigerate them for longer freshness.
Final Thoughts
Peanut Butter Cup Brownies are not just any dessert; they combine rich chocolate with creamy peanut butter cups for a delightful treat. Feel free to customize this recipe by adding nuts or using different types of chocolate chips. Give it a try and enjoy these luscious brownies!
OMG Peanut Butter Cup Brownies
- Total Time: 55 minutes
- Yield: Serves approximately 15 brownies 1x
Description
Indulge in the deliciousness of OMG Peanut Butter Cup Brownies, where rich chocolate meets creamy peanut butter cups for a dessert that’s simply irresistible. These brownies feature a fudgy chocolate base layered with delectable peanut butter cups, making them perfect for any occasion—from family gatherings to cozy nights at home. Easy to make and even easier to enjoy, this recipe will quickly become a favorite among friends and family. Serve them warm with a scoop of ice cream or topped with whipped cream for an extra special treat!
Ingredients
- 3 sticks unsalted butter
- 4 1/2 ounces unsweetened baking chocolate, roughly chopped
- 1 1/2 cups 60% Cacao bittersweet chocolate chips
- 6 large eggs, room temp
- 1 1/2 cups granulated sugar
- 1 1/2 cups brown sugar, packed
- 1 teaspoon salt
- 1 tablespoon vanilla extract
- 1 1/2 cups all-purpose flour or gluten-free flour
- 3/4 teaspoon baking powder
- 1 – 12 oz miniature peanut butter cups
- 1/4 cup milk chocolate chips
- 1/2 cup peanut butter
- 1/2 cup white baking chocolate chips
- 1 – 12 oz miniature peanut butter cups, rough chopped
Instructions
- Preheat your oven to 350°F (175°C) and line a 9×13 baking pan with foil or parchment paper.
- Melt the butter, unsweetened baking chocolate, and bittersweet chocolate chips over low heat until smooth.
- In a large mixing bowl, whisk together eggs, granulated sugar, brown sugar, and salt until combined.
- Stir in the melted chocolate mixture followed by vanilla extract.
- In another bowl, mix flour and baking powder; then gently fold into the chocolate mixture.
- Pour two-thirds of the batter into the prepared pan and layer with one bag of miniature peanut butter cups. Spread the remaining batter on top and sprinkle with milk chocolate chips.
- Bake for 35 minutes or until a toothpick comes out clean from the center.
- Let cool briefly before adding chopped peanut butter cups on top and drizzle melted white chocolate.
- Prep Time: 20 minutes
- Cook Time: 35 minutes
- Category: Dessert
- Method: Baking
- Cuisine: American
Nutrition
- Serving Size: 1 square (60g)
- Calories: 320
- Sugar: 28g
- Sodium: 150mg
- Fat: 17g
- Saturated Fat: 10g
- Unsaturated Fat: 5g
- Trans Fat: 0g
- Carbohydrates: 37g
- Fiber: 2g
- Protein: 5g
- Cholesterol: 95mg
Keywords: For an added twist, substitute different types of nut butters or mix in nuts for texture. Ensure ingredients like eggs are at room temperature for better mixing.