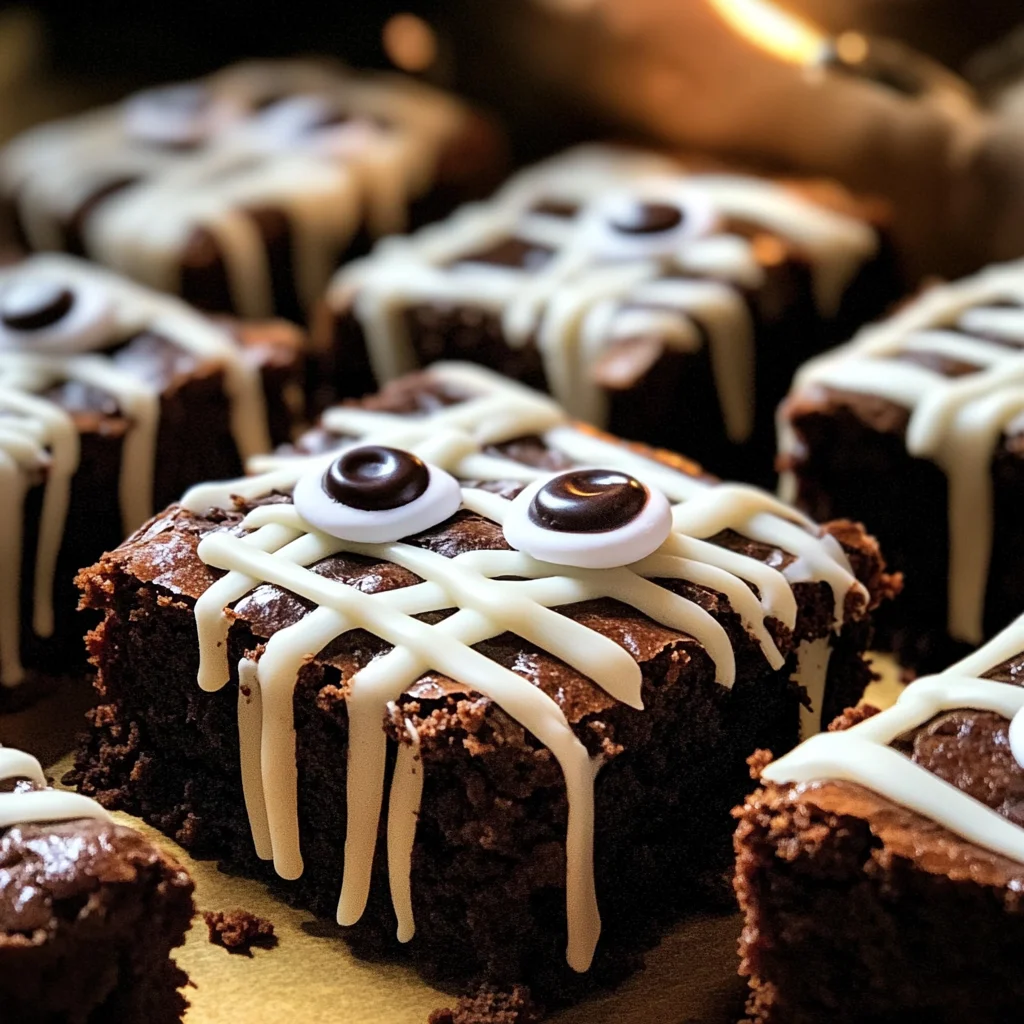
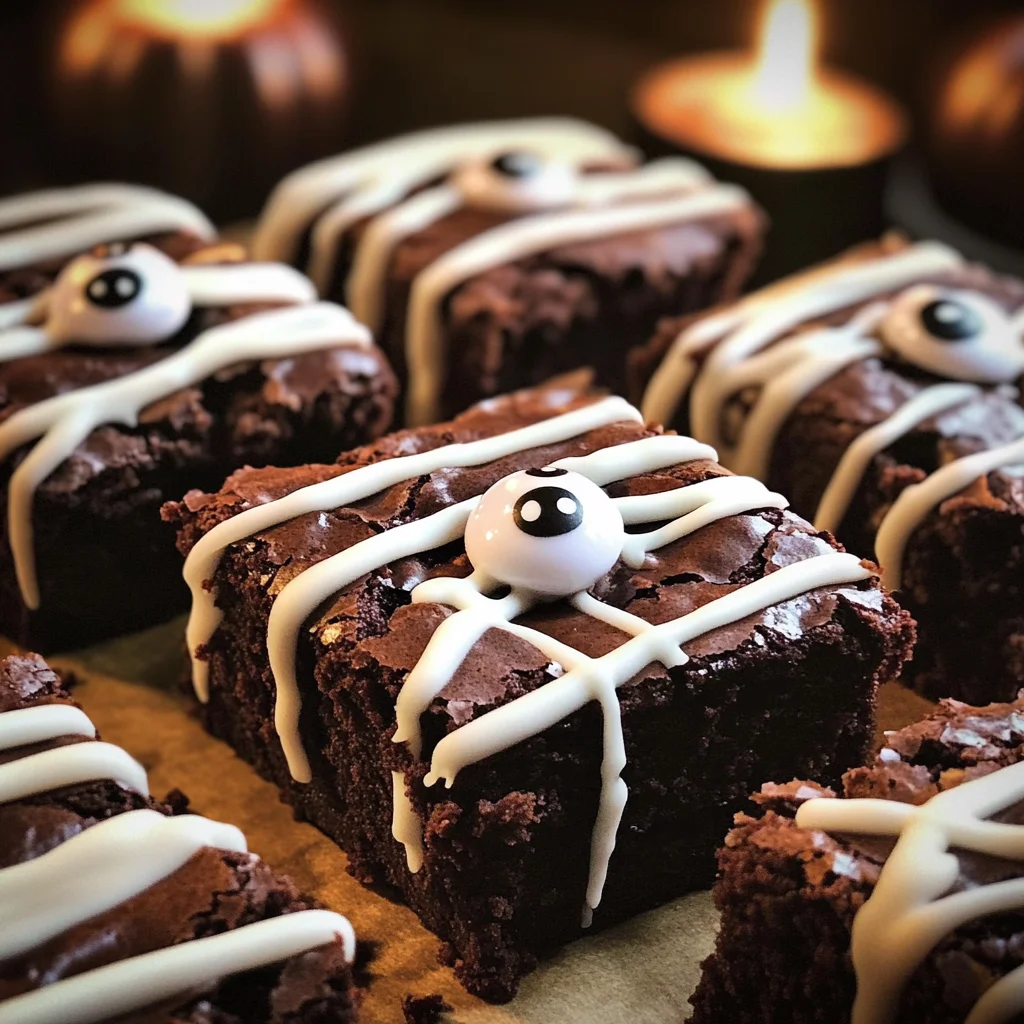
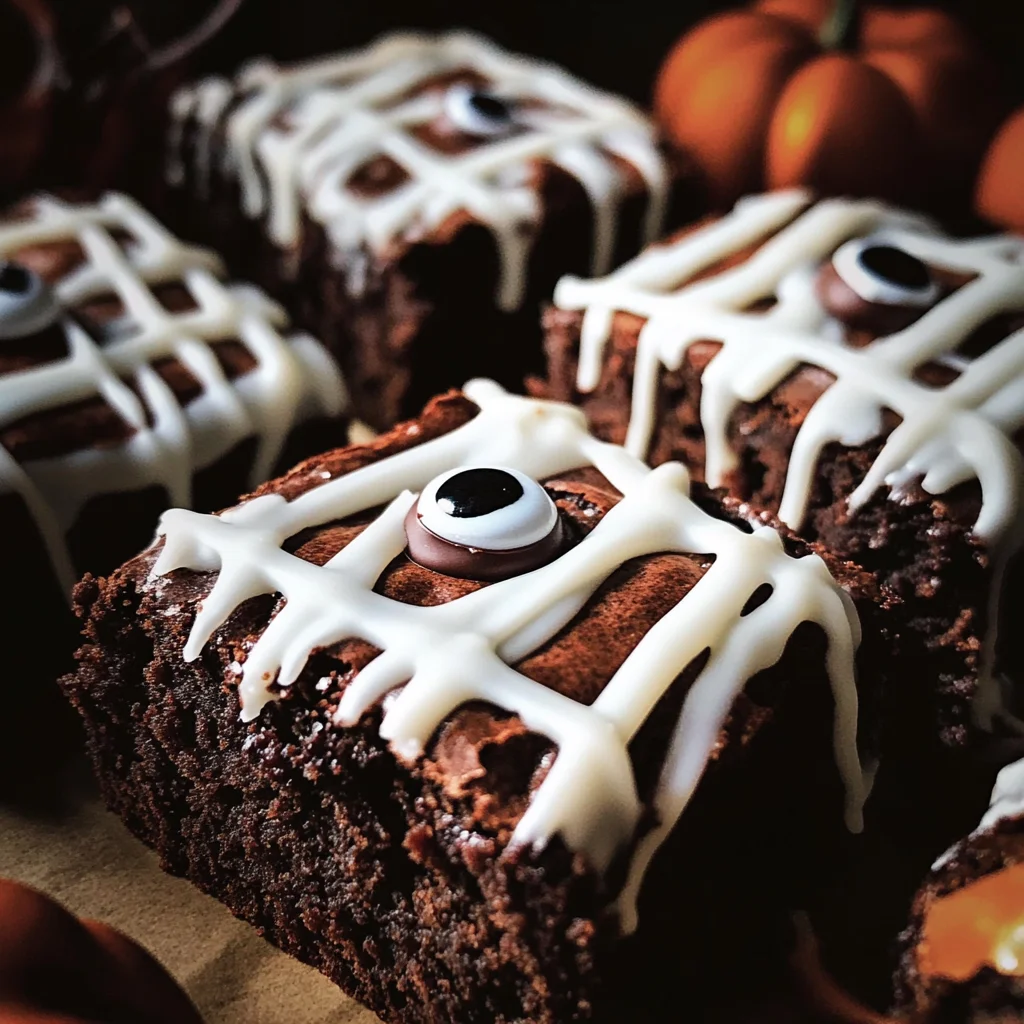
The spooky mummy brownies are the perfect Halloween treat, combining delicious chocolate flavor with a fun and festive appearance. Their adorable design makes them ideal for parties, school events, or simply an afternoon of baking with the kids. With layers of rich chocolate and whimsical icing, these brownies will delight both children and adults alike!
Why You’ll Love This Recipe
- Cute and Festive: These brownies look just like mummies, making them a fun addition to your Halloween festivities.
- Rich Chocolate Flavor: Made with dark chocolate chips, these brownies are decadently delicious.
- Kid-Friendly Fun: Involve the kids in decorating with candy eyes and icing for a memorable baking experience.
- Easy to Make: With straightforward steps, you can whip up these spooky treats in no time.
- Perfect for Sharing: Cut them into different sizes to cater to all ages at your gathering.
Tools and Preparation
Before diving into making your spooky mummy brownies, gather your tools. Having everything ready will make the process smoother.
Essential Tools and Equipment
- 9 x 9 inch cake pan
- Microwave-safe bowls
- Stand mixer or hand mixer
- Spatula
- Parchment paper
- Ziptop bag or pastry bag
Importance of Each Tool
- 9 x 9 inch cake pan: The perfect size for baking thick brownies that hold their shape while cooling.
- Stand mixer or hand mixer: Helps achieve fluffy eggs quickly, ensuring a light texture in your brownies.
- Spatula: Essential for spreading brownie batter evenly in the pan.
Ingredients
Almost too cute to eat. Honestly, I can’t eat them because they’re way too cute. But so delicious. It’s a moral battle.
Ingredients:
– 10 tbsp butter
– 1 1/2 cups dark chocolate chips or chunks
– 1 cup sugar
– 1/4 cup dark brown sugar
– 3 eggs, at room temperature
– 1 tsp espresso powder (optional)
– 2 tsp vanilla extract
– 3/4 cup all-purpose flour
– 1/3 cup unsweetened cocoa powder
– 1/2 tsp baking powder
– 1/2 tsp kosher salt
– 1 package candy eyes
– 20 oz semi-sweet or milk chocolate chips
– 1 tbsp coconut oil
– 1 cup powdered sugar
– 2-3 tbsp heavy cream, to thin
How to Make spooky mummy brownies
Step 1: Preheat the Oven
Preheat your oven to 350 degrees F. Line a 9 x 9 inch cake pan with parchment paper, allowing it to hang over the edges for easy removal later.
Step 2: Melt Butter and Chocolate
In a microwave-safe bowl:
1. Heat 1 cup of chocolate chips with the butter for 1 minute.
2. Stir until the bowl is cool enough to touch; if necessary, microwave for another 20 seconds.
3. Whisk in both sugars until dissolved.
Step 3: Beat Eggs
In the bowl of a stand mixer:
1. Vigorously beat the eggs until frothy (about 2–3 minutes).
2. With the mixer running, slowly stream in the chocolate mixture until smooth.
3. Mix in espresso powder (if using) and vanilla extract.
Step 4: Combine Dry Ingredients
To the chocolate mixture:
1. Add flour, cocoa powder, baking powder, and salt.
2. Beat until just combined.
3. Fold in remaining chocolate chips gently.
Step 5: Bake Brownies
Spread batter evenly into the prepared pan from edge to edge using a spatula:
1. Bake for 25–30 minutes or until an inserted toothpick comes out with a few moist crumbs.
2. Let cool before cutting into squares (9 large or 12 smaller). Freeze for 15 minutes.
Step 6: Prepare Coating
In another large microwave-safe bowl:
1. Combine chocolate chips and coconut oil.
2. Heat for 1 minute and stir; if needed, warm another 20 seconds until smooth.
3. Let cool for about 5 minutes while lining a baking sheet with parchment paper.
Step 7: Coat Brownies
Remove brownies from the freezer:
1. Dip each brownie into melted chocolate using a fork to coat all sides.
2. Allow excess chocolate to drip off before placing them on parchment-lined sheets.
3. Chill in the fridge for about 15 minutes.
Step 8: Make Bandage Icing
To create bandage icing:
1. Whisk together powdered sugar and heavy cream (start with one tablespoon).
2. Add more cream as needed until it reaches a thicker consistency like glue.
3. Transfer icing into a ziptop bag with one corner snipped off or use a pastry bag.
Step 9: Decorate Your Mummy Brownies
Remove brownies from fridge:
1. Use icing to create crisscross patterns resembling bandages on top of each brownie.
2. Attach candy eyes onto the icing while it’s still soft.
3. Allow icing to harden for about ten minutes before serving.
Enjoy your delightful spooky mummy brownies as you celebrate Halloween!
How to Serve spooky mummy brownies
These spooky mummy brownies are perfect for Halloween gatherings, parties, or cozy family nights. With their adorable appearance and delicious taste, they are sure to delight both kids and adults alike.
For a Halloween Party
- Display on a Festive Platter: Arrange the brownies on a Halloween-themed platter with spiderweb decorations for an eye-catching centerpiece.
- Pair with Spooky Snacks: Serve alongside ghost-shaped cookies or pumpkin-flavored cupcakes to create a fun dessert table.
As a Movie Night Treat
- Serve with Warm Milk: A glass of warm milk complements the rich chocolate flavor and adds comfort to your movie night.
- Add Popcorn: Mix in some caramel popcorn for a sweet and salty contrast that enhances your snacking experience.
In Lunchboxes
- Perfect Kids’ Lunchbox Addition: Cut the brownies into smaller squares to fit into lunchboxes as a sweet surprise for school lunches.
- Pair with Fruit: Include apple slices or grapes on the side to balance out the sweetness of the brownies.
How to Perfect spooky mummy brownies
To ensure your spooky mummy brownies turn out perfectly every time, follow these helpful tips.
- Boldly Choose Quality Chocolate: Use high-quality dark chocolate chips for a richer flavor that enhances the brownie’s overall taste.
- Boldly Measure Ingredients Accurately: Precision is key in baking. Use measuring cups and spoons to ensure you have the right amounts of each ingredient.
- Boldly Allow Cooling Time: Letting the brownies cool before cutting helps maintain their shape, making it easier to decorate them as mummies.
- Boldly Experiment with Icing Thickness: Adjust the icing consistency by adding cream bit by bit until it reaches a workable thickness for decorating.
- Boldly Incorporate Espresso Powder: Adding espresso powder intensifies the chocolate flavor without making the brownies taste like coffee.
Best Side Dishes for spooky mummy brownies
To create a well-rounded dessert experience, consider pairing these spooky mummy brownies with some delightful side dishes.
- Bold Vanilla Ice Cream: A scoop of creamy vanilla ice cream is a classic pairing that balances out the richness of chocolate.
- Bold Pumpkin Spice Whipped Cream: Add seasonal flair by whipping heavy cream with pumpkin spice; it pairs wonderfully with chocolate desserts.
- Bold Apple Slices with Caramel Dip: Fresh apples dipped in caramel provide a crunchy contrast and add freshness to your dessert spread.
- Bold Chocolate-Covered Strawberries: These treats can be made easily and offer a fruity complement that enhances the brownie experience.
- Bold Berry Medley Salad: A mix of fresh berries adds brightness and acidity, cutting through the sweetness of the brownies.
- Bold Hot Chocolate Bar: Set up a hot chocolate station where guests can customize their drinks, providing warmth and excitement alongside your spooky treats.
Common Mistakes to Avoid
When making spooky mummy brownies, it’s easy to make mistakes that can affect the outcome. Here are some common pitfalls and how to steer clear of them:
- Skipping room temperature ingredients: Ensure your eggs are at room temperature for better mixing. This helps in creating a smoother batter.
- Overmixing the batter: Mix until just combined to keep the brownies fudgy. Overmixing can lead to dense, cake-like brownies.
- Not cooling enough before cutting: Allow the brownies to cool completely before cutting. This prevents them from falling apart and helps maintain their shape.
- Ignoring the thickness of icing: The icing should be thick like Elmer’s glue. If it’s too thin, it won’t hold its shape when you pipe it onto the brownies.
- Using old baking powder: Always check your baking powder for freshness. Expired baking powder can result in flat brownies that don’t rise properly.
Storage & Reheating Instructions
Refrigerator Storage
- Store leftover spooky mummy brownies in an airtight container.
- They will last for up to 5 days in the refrigerator.
Freezing spooky mummy brownies
- Wrap each brownie individually in plastic wrap or foil.
- Place wrapped brownies in a freezer-safe bag or container. They can be frozen for up to 3 months.
Reheating spooky mummy brownies
- Oven: Preheat to 350°F and warm for about 10 minutes for a freshly baked taste.
- Microwave: Heat for about 10-15 seconds per brownie for a soft texture, but watch closely to avoid overheating.
- Stovetop: Place brownies in a skillet over low heat, covering with a lid for a few minutes until warmed through.
Frequently Asked Questions
Here are some frequently asked questions about making spooky mummy brownies:
Can I use different types of chocolate chips?
Yes! You can use semi-sweet or milk chocolate chips based on your preference. Each type will give a unique flavor profile.
How can I customize my spooky mummy brownies?
Feel free to add nuts, caramel swirls, or even sprinkles before baking. Get creative with toppings too!
What if I don’t have coconut oil?
You can substitute coconut oil with any neutral oil like vegetable oil or melted butter without affecting the recipe significantly.
Are spooky mummy brownies kid-friendly?
Absolutely! These treats are fun and visually appealing, making them perfect for kids’ parties or Halloween celebrations.
How do I make the icing whiter?
To achieve a brighter white color for your icing, consider using clear vanilla extract instead of regular vanilla extract.
Final Thoughts
Spooky mummy brownies are not only irresistibly cute but also deliciously rich. They make an excellent treat for Halloween gatherings or any festive occasion. Feel free to customize them by adding your favorite mix-ins or toppings! Give this recipe a try and delight your family and friends with these charming treats.
Spooky Mummy Brownies
- Total Time: 55 minutes
- Yield: Approximately 12 servings 1x
Description
Indulge in the festive fun of spooky mummy brownies, your new go-to Halloween treat! These delightful chocolate brownies are not only rich and fudgy but also decked out to resemble cute mummies. Perfect for parties, school events, or cozy family baking sessions, these treats will enchant both kids and adults alike. With minimal effort, you can whip up these adorable desserts that are as enjoyable to make as they are to eat. Get ready to impress your guests with this simple yet creative dessert that brings a playful spirit to any Halloween celebration!
Ingredients
- 10 tbsp butter
- 1 1/2 cups dark chocolate chips
- 1 cup sugar
- 3 eggs (room temperature)
- 3/4 cup all-purpose flour
- 20 oz semi-sweet chocolate chips
- 1 tbsp coconut oil
- 1 cup powdered sugar
- Candy eyes for decoration
Instructions
- Preheat your oven to 350°F and line a 9 x 9 inch cake pan with parchment paper.
- Melt butter and dark chocolate chips in a microwave-safe bowl until smooth.
- Beat eggs until frothy in a stand mixer, then combine with the melted chocolate mixture.
- Gradually mix in flour, cocoa powder, baking powder, and salt until just combined.
- Pour batter into the prepared pan and bake for 25–30 minutes or until a toothpick comes out with moist crumbs.
- Allow brownies to cool before cutting into squares.
- Melt semi-sweet chocolate chips with coconut oil and dip each brownie for coating.
- Make icing by mixing powdered sugar with heavy cream; pipe onto brownies as mummy bandages and add candy eyes.
- Prep Time: 25 minutes
- Cook Time: 30 minutes
- Category: Dessert
- Method: Baking
- Cuisine: American
Nutrition
- Serving Size: 1 brownie (50g)
- Calories: 240
- Sugar: 22g
- Sodium: 80mg
- Fat: 14g
- Saturated Fat: 8g
- Unsaturated Fat: 4g
- Trans Fat: 0g
- Carbohydrates: 27g
- Fiber: 2g
- Protein: 3g
- Cholesterol: 40mg
Keywords: For richer flavor, use high-quality dark chocolate. Customize your brownies by adding nuts or swapping chocolate types based on preference.

